- Published on
Keeb Workshop Tutorial
- Authors
- Name
- Franklin Logan

Welcome to Typing Simulator's workshop mode! We've all spent entirely too long waiting for a set of keycaps we bought from a group buy to show up (and sometimes they don't show up at all...) so when we started working on the game we knew we needed to make an in game editor that would let players make their own keebs. The UI/UX is all keyboard based, so we wanted to write up a guide on the workflow for everyone to refer to.
Making a custom keeb
This guide will focus on the in game editor. You can edit the keeb files directly for a more freeform/in-depth experience, but thats a bit more technical. For the sake of simplicity, a guide for that will come in a future post.
Workshop Menu

You'll first find yourself in this initial menu with your currently selected keeb. We've included a handful of keebs to get you all started, and many of them have matching edits by one of the team members to serve as an example/starting point. From here you can select a keyboard, and hit the Edit as Copy option to make a local copy for you to work with in the editor.
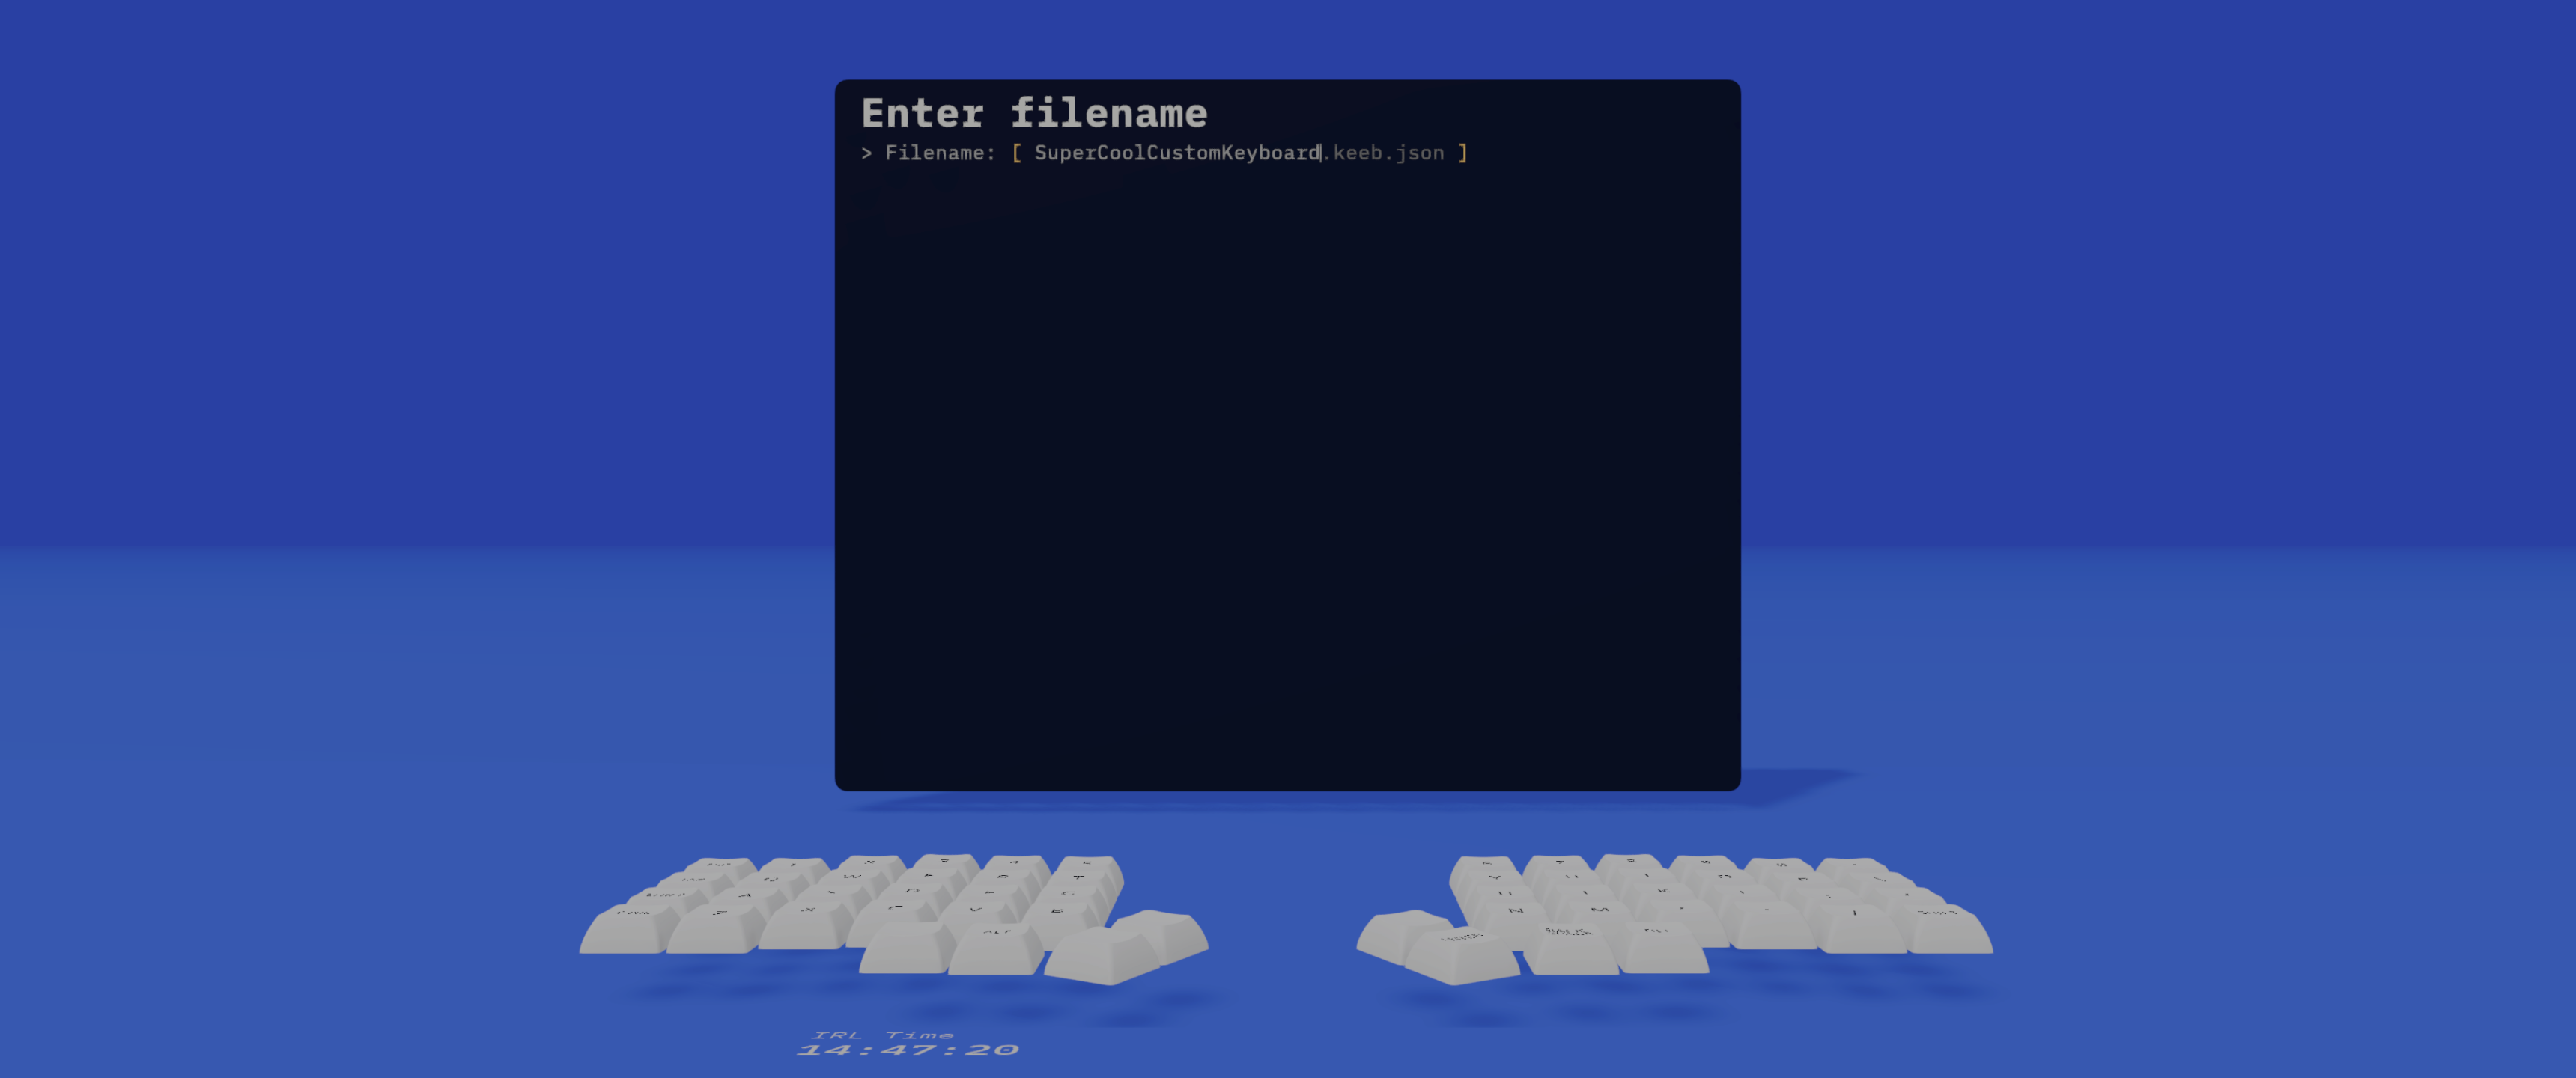
The editor will prompt you to for the filename of your copy here. This is just the name of the file itself; there is separate metadata that you can add in a bit to set the in game name to whatever you want it to be.
Editing a keeb
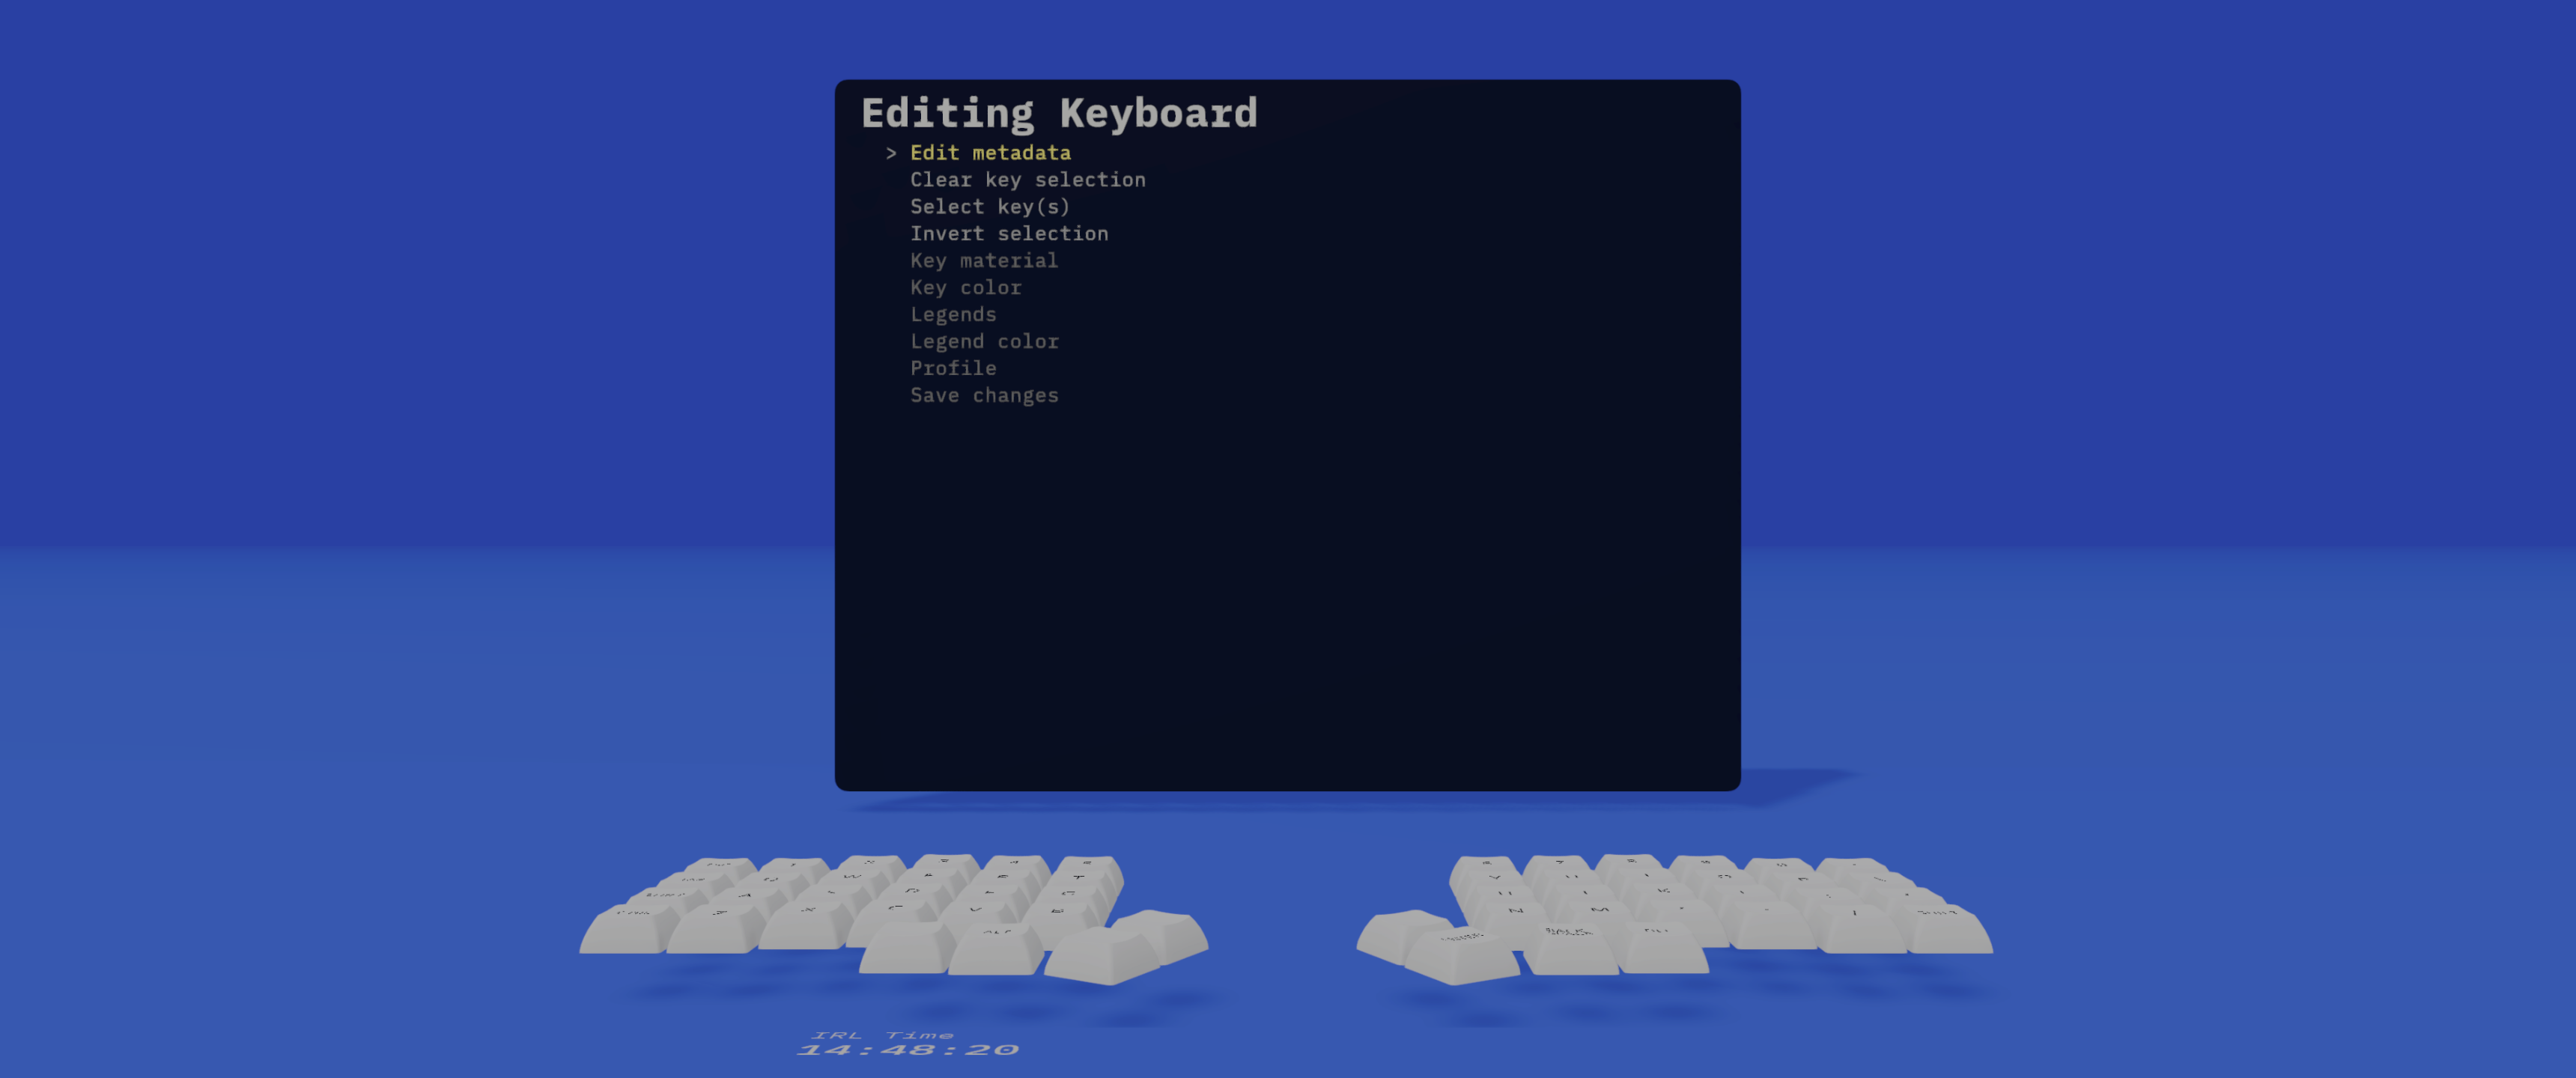
Once you have your own copy made, we hop right in to the keeb editor itself. You have a number of menu options here so it might be a touch overwhelming at first, but the general flow is pretty simple:
- Select a key or group of keys, either one by one or via the groups at the top of the list.
- Modify the currently active selection via the menus. All changes will be applied to that selection automatically.
- Once you're satisfied, you can clear that selection and repeat to continue modifying the keeb until you're done.
When you're done with all of your edits, be sure to hit the Save Changes option at the bottom of the main menu and you're all set to use your keeb anywhere in game!
With that you should be ready to explore the customization options and see what you come up with.
Uploading a keeb
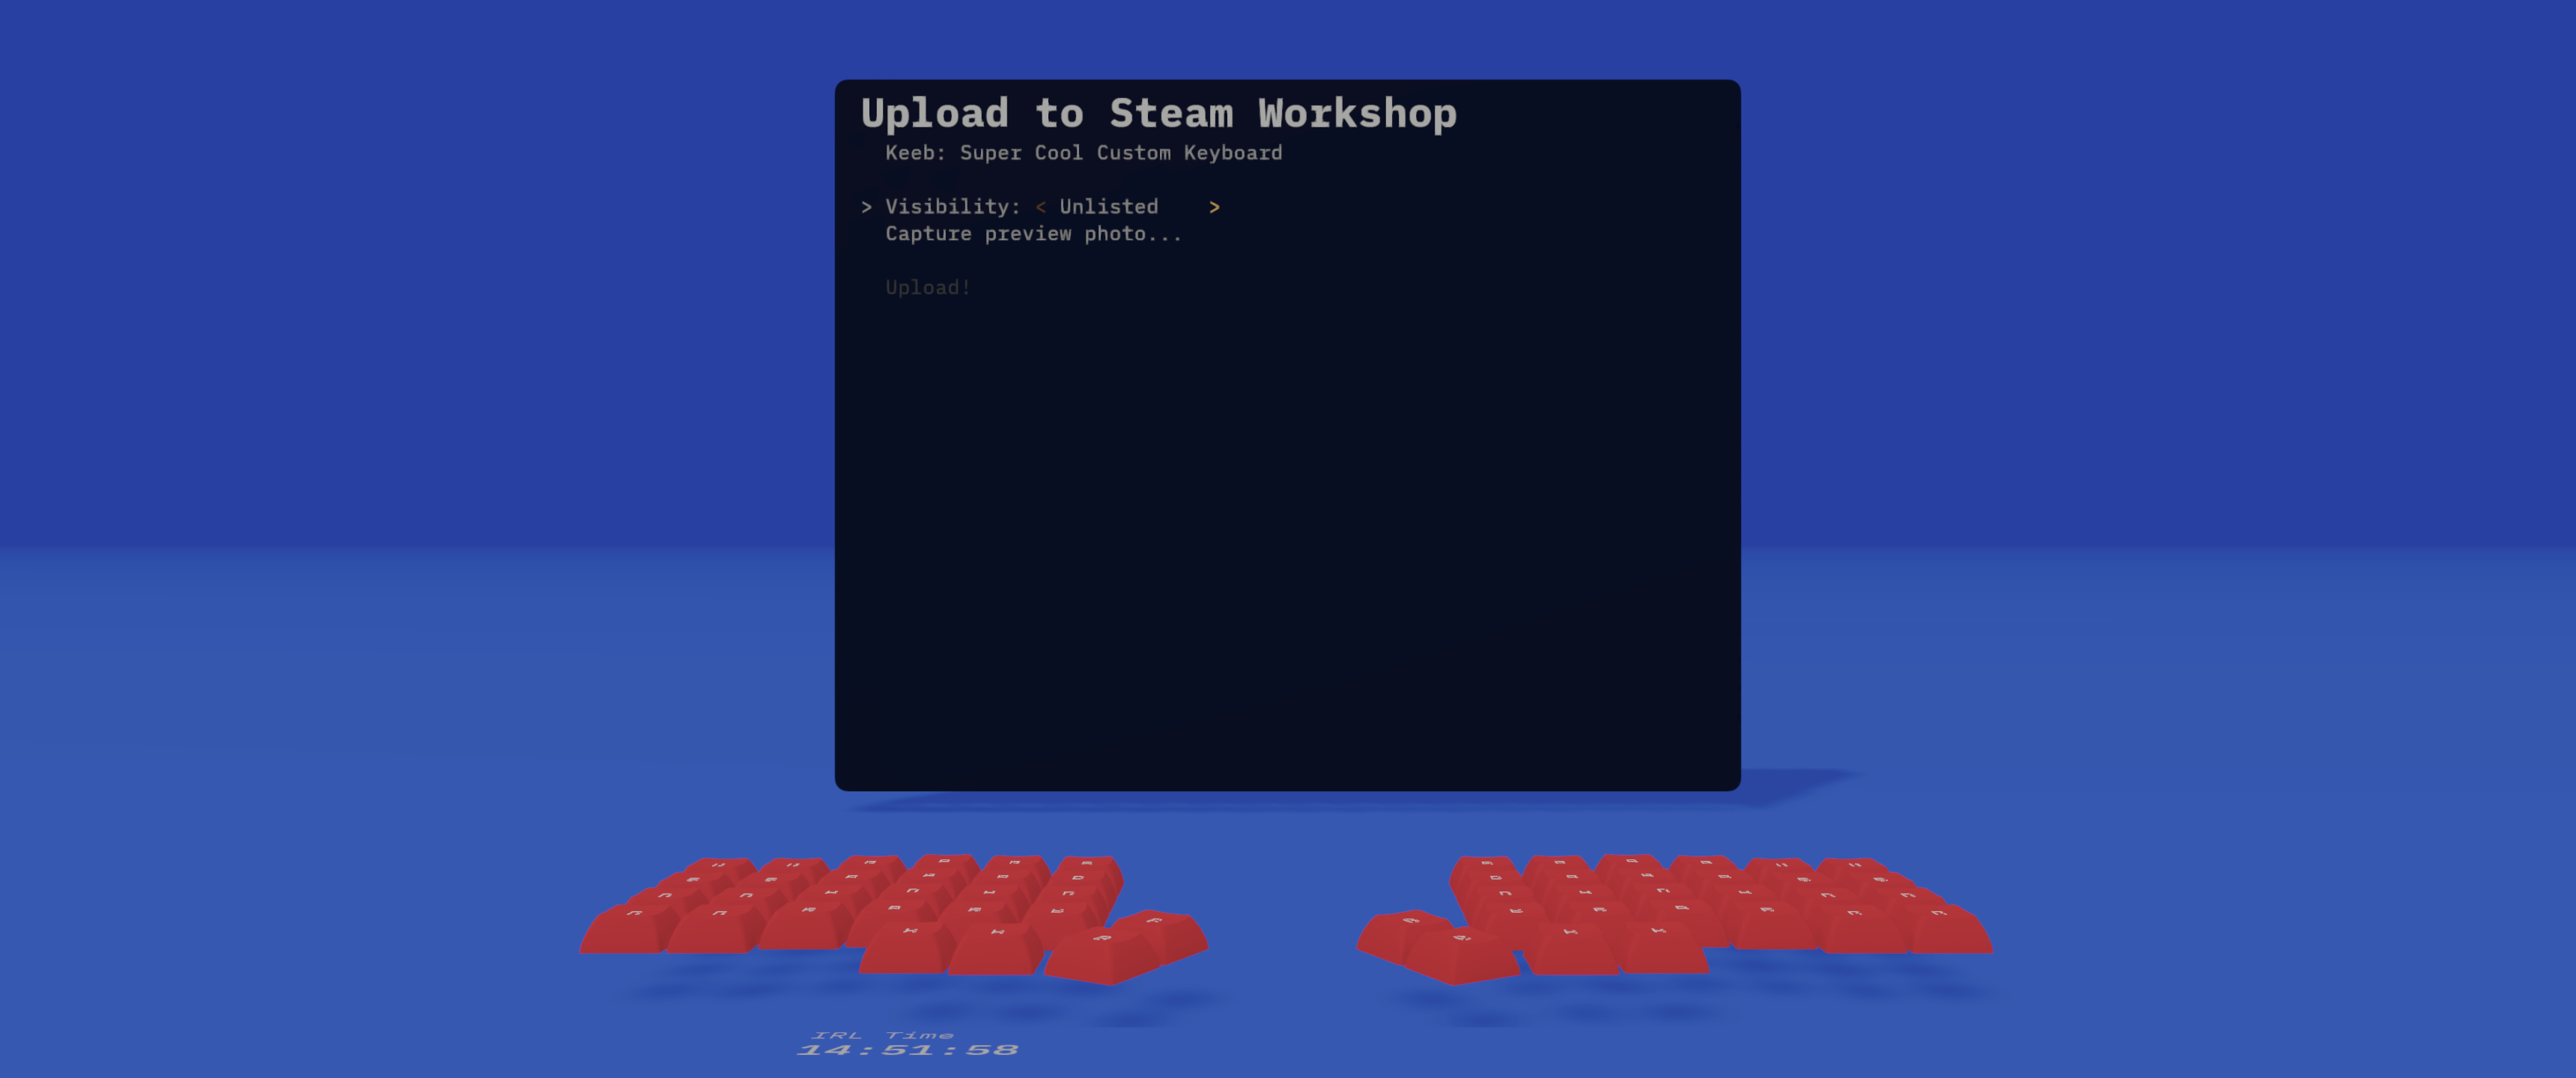
Happy with what you've made and want to share it to the world? Once you have a custom keeb created and saved, you can back out to the main workshop menu and upload it to the steam workshop. Select your visibility preferences, use the in game photo mode to take a thumbnail picture for your upload (more details on how to use this in a separate blog post), and then hit upload!
Editor Functionality Details
Want some more details about what actually is available? Lets dive in!
Selection
You have a number of options for selecting key caps to edit:
- All Keys: Selects the entire keyboard.
- Groups: Each of the packaged keyboards come with a number of predefined groups. These should be common selection patterns (things like all of the alphas, all of the numeric keys, modifiers, WASD, etc.) These will vary based on which keeb you selected as your base as the layout will change which of these is relevant.
- Filtering: You can type into the filter text field at the top to narrow down the list of displayed keys. Once you have filtered you can select which ones you want individually
- Individual Keys: You can scroll through the list of keys and hit enter to select them one by one.
When you select a key you should see the key float up from the board and begin to hover to indicate that it's part of the currently active selection.
Once you complete your selection, you can hit escape on your keyboard to go back to the editing menu. You can also invert your currently active selection from this top level as well.
Customization Options
We are regularly adding new customization options to all of these categories, so instead of going through all of the options, this will describe the individual categories.
Key Material
This changes the nature of the surface of the keycaps themselves.
Key Color
Changes the primary color of the keycap surface. This will work differently depending on which Key Material you have active for these keycaps. You have three ways to select a color:
- Pick from the predefined list (If you're wondering, yes, this is the CSS color names list)
- Input a RGB value
- Input a Hex value
Legends
Changing the legends on a keycap is a two step process:
- Select a legend slot: The legend slot is the location of the legend on the keycap itself. We've set this up with the typically used locations on keycap sets. You can have any combination of them that you would like, but you can only have one legend per slot.
- Make a modification: Select which legend set you would like to choose from, and then select the actual legend itself. These are listed out with their underlying IDs and a small image preview nest to them.
Available Legend Slots
- UpperLeft: The upper left section of the top of the keycap
- UpperCenter: The upper middle section of the top of the keycap
- UpperRight: The upper right section of the top of the keycap
- LowerLeft: The lower left section of the top of the keycap
- LowerCenter: The lower middle section of the top of the keycap
- LowerRight: The lower right section of the top of the keycap
- CenterCenter: The center of the top of the keycap
- Front: The top of the front face of the keycap
- Full: The entire top of the keycap from edge to edge
- FullHeight: The entire top of the keycap from edge to edge, scaled to account for the width of the keycap. Particularly useful for modifiers and keys over 1U in general
Legend Color
This is the same as the Key Color menu, applies to all legends in all slots.
Profile
You can select from any of the profile models we have in the game. We have included all of the row variations for the profiles that vary from row to row. We don't have any restrictions around this, so you can put a row 5 keycap in row 1, or vise-versa.
Show us what you come up with
Give the editor a spin and be sure to upload your cool keebs to the workshop so that we can all give them a shot! We're excited to see what you all end up creating. We'll continue adding more features to the editor over time, so if you have any feedback or input please let us know!